What Is The Photoshop Color Settings Dialog
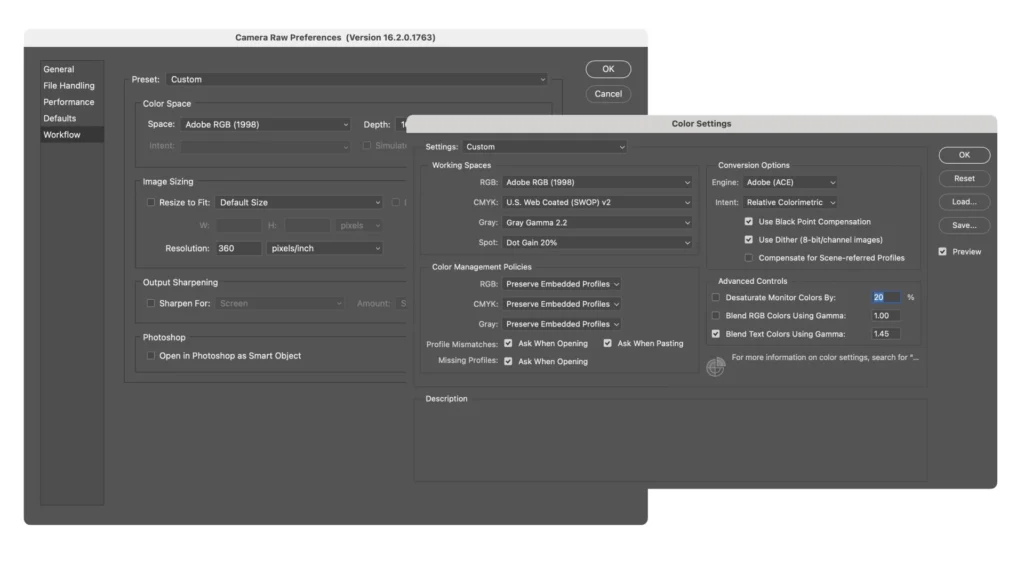
In Adobe Photoshop, the Color Settings dialog is a tool used to manage color settings for your images. It allows you to customize how colors are interpreted and displayed within Photoshop, ensuring consistency across different devices and applications.
To access the Color Settings dialog in Photoshop, you can go to the “Edit” menu, then select “Color Settings.” Alternatively, you can use the keyboard shortcut “Ctrl+Shift+K” (Windows) or “Cmd+Shift+K” (Mac).
Within the Color Settings dialog, you’ll find various options and settings related to color management, including:
- Working Spaces: This section allows you to choose the color profiles for your working RGB, CMYK, and grayscale color spaces. These profiles define the color characteristics of the images you work on.
- Color Management Policies: Here, you can specify how Photoshop handles color management for various scenarios, such as when opening or pasting images with embedded color profiles.
- Conversion Options: This section provides options for how Photoshop handles color conversions between different color spaces.
- Advanced Controls: Advanced options for fine-tuning color management settings, including rendering intents and black point compensation.
- Profile Mismatches: Settings for how Photoshop handles situations where there’s a mismatch between color profiles.
- Missing Profiles: Options for handling images that lack embedded color profiles.
The Color Settings dialog is crucial for ensuring consistent color reproduction across different devices and workflows. By configuring these settings appropriately, you can maintain color accuracy and predictability in your Photoshop projects.
Photoshop Color Settings I use

Adobe Camera Raw Settings
In the Adobe Camera Raw settings dialog, I also like to ensure that the Color Space matches that of what I have set in the Adobe Photoshop Color Settings.


